Monday 30 June 2014

A Finish - “Owls of a Feather…"

You might remember some time ago I wrote about repurposing some gingham squares I had in my stash box for nearly 2 years!  When you run out of steam on a project and the original idea really isn’t worth it it’s ok in my book to make it into something else!

_DSF5176

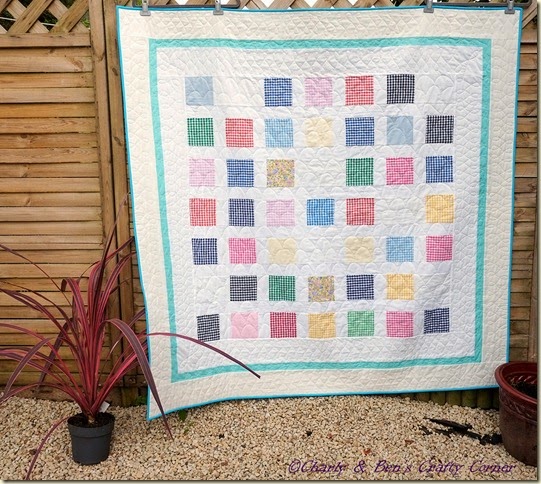
I finally finished my donation quilt!  The pattern is from creative Patchwork magazine by Sally Ablett and is designed for a pack of 5” charm squares.  Sally cleverly uses blank spaces to spread the squares out a bit with two borders and a skinny strip to frame the quilt.  If you have a spare lonely charm pack lying around you might try this one out! 


I had a stack of squares I had cut up for a double bed quilt and I was bored with just sashing them and joining them together, so they become this lovely quilt which I’m calling Owls of a Feather because of the cute fabric on the back.  (Honestly I couldn’t think of a name for this one and it was the best I could come up with!)

_DSF5180

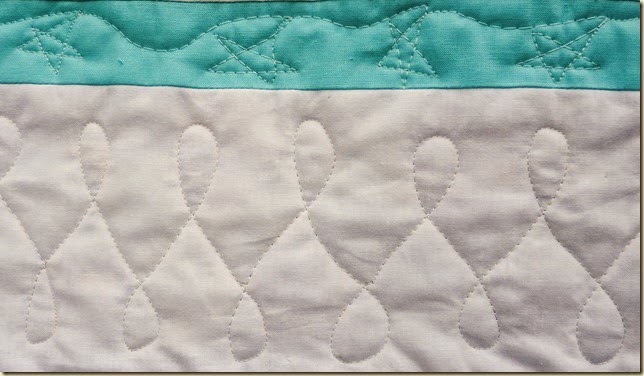
The main body of the quilt was quilted with gentle curves (Clamshell pattern).  This was my first time trying this pattern and it would have gone better if I had given myself some marked lines to stay within.  I eyeballed it across the quilt and they are not the most even of shapes but it does give a really nice texture to the quilt.  Next one will be better!


I quilted the two outside borders in figure of 8 and had a bit of difficulty turning the corners.  Little stars in the skinny border finished it off and though the quilting isn’t perfect yet, (stops and starts I need to practice), I really like how it turned out and I was definitely getting better by the time I got to the end of the quilt!
 
_DSF5188

Of course all of this was done before I attended a Free Motion Quilting Class and saw Rachel @ Stitched in Color’s tutorial on figure of 8 quilting!  I love this quilting pattern and Rachel explains it brilliantly.  I quilted mine right to left and Rachel does hers from top to bottom.  If you want to try it yourself Rachel’s tutorial is here on her blog.


As this will be used by kids and may get washed a lot I sewed the binding down by hand and also machine stitched along the inside just in case!


You do get a line of stitching on the back but it's almost invisible on the front.  Probably unnecessary but made me feel better.  

_DSF5182

For now this has been posted off and I still have another 70 or so gingham squares left in the box!  The fabric used was Moda Bella White, Kona Azure, Kona Peacock for the binding and I think the cream was Ikea!  Measures approx 65” x 65”.

As this was a FAL goal I'm linking up to The Littlest Thistle, the Library Project, and the Friday Finishes.  
Finish Along 2014
Crazy Mom Quilts and

Friday 27 June 2014

Photo Friday: Camera Noise - what is it, how to control it and how to get rid of it!

In the last post, we talked about changing the ISO setting on your camera, to change the sensitivity of your sensor to light.  In low light, the sensor is more sensitive at higher ISO’s and can use lower light levels for exposure.

This can result in a faster shutter speed, allowing you to hand hold your camera or get sharp shots when bright light is not available. 

Noise Reduction applied on left, original as shot on right!
There is a trade off to this.  When you increase your ISO the noise that is generated by the sensor becomes more apparent.  In the last post, we said when shooting in low light hand holding the camera, it was better to get a noisy image you could work with than a blurred image you can do nothing with.

Noise is seen as speckled, splotchy areas in your image.  It is seen more in the shadow areas where there is the least amount of light available.  This can make taking images of dark subjects (like navy or black areas on a quilt) difficult.  Don't worry, there are things you can do to minimise it!


The best way to reduce noise in your image is to shoot in bright light with the lowest ISO possible for your image. This may mean turning off Auto ISO and overriding the camera to a lower number (your shutter speed & aperture settings will be adjusted!)  When using a digital camera, there are a wide range of ISO settings available to you.  Every camera will have a native ISO setting that gives the least amount of noise.  It’s usually ISO 100 or 200.  As you increase ISO you increase the visibility of noise in your image.


Increasing the ISO is a very handy tool to have when you need to. How high can you go without getting too much noise?  Well that depends on the camera sensor and what you can live with.  Most people don’t see noise in photos but photographers will see it straight away and try to minimise it to get as clean a shot as possible.  What’s acceptable to one person might not be to the next, so it’s up to you what level of noise you can live with in your image.  

(Noise is generated by a number of things.  The light hitting the sensor can vary in intensity giving a flux to the signal, the smaller the photosites gathering the light and the more dense they are gives an increased appearance of noise, long exposure times can increase the sensor heat which contributes to noise and the process the camera uses to create your image from the data collected can contribute also.)

Compact cameras, with their smaller sensors will show noise more immediately than an APS-C or a full frame dSLR.  The smaller the sensor, the more noise is apparent at higher ISO’s.


More MP is handy if you crop your photos a lot but the more pixels on a sensor the more heat they generate and this can contribute to noise especially if they are packed closely together.  In fact, Sony have just released a brand new camera (A7s) specifically for low light, high ISO, low noise with a 12MP sensor!  (A 12MP sensor will happily give you an A3 print or 16” x 24”)  So if you are having a problem with noise a bigger sensor will help!

(Tip: Don't use digital zoom when you are taking photos with a compact camera.  If you can turn it off, do and stick to the optical zoom the camera lens can give you!)


Keeping your camera cool will help too.  If you live in a hot area instead of keeping your camera in the boot of the car keep it with you in the air-conditioned area of the car.

Likewise keep your camera in a cool spot in your house before you take it out to use it, this will help minimise noise. 
A newer camera can also help!  (The newer cameras will let you go into the 10’s to 100’s of thousands in ISO, though I wouldn’t necessarily use this level of ISO myself!)  As sensor design has gone on they have gotten better at controlling noise.  Every sensor will produce noise and the camera will process every image with noise reduction.  You can change this in the camera settings on the more expensive cameras or if you shoot RAW, process the noise reduction yourself.

A lot of photographers don’t like the camera’s Noise Reduction (NR) as it can smooth things out too much and blur fine detail.  Over use of NR can give a plastic feel to the image.  Many photographers prefer to correct this themselves in post processing software like Lightroom, Photoshop,  and speciality programs like Topaz deNoise and Noise Ninja (which I really like!). 

NR can really help a lot!  Just to show you how much it can do, I searched for the worst example of noise I could find.  This photo of my mum, in Germany at night time along the riverbank, was taken in very low light, and underexposed on a compact camera!  A bad mix and the noise generated is pretty awful!


Remember you can process JPEG images as well as RAW files in Lightroom or Adobe Camera Raw on Photoshop or Photoshop Elements (use Open as in the File menu and click on Camera raw in the drop down box before selecting your image!) 


Clicking on the second tab that looks like 2 triangles will open the sharpening and noise reduction menu.  There are 2 types of noise, luminance and colour.  Luminance is usually the worst offender.  Applying NR will soften your image and can blur fine detail so you will want to play with the amount and detail sliders to get the look you want.  When done well you can have a pleasing image as in the photo at the beginning of this post. When done wrong your image will look like plastic!  Don't be afraid to play with it.  This image of mum with NR is still not a pleasing photo but the example is there to show what noise reduction software can do!

Noise is always there but in bright light, enough light is collected to keep the ratio of light to noise high.  In low light this ratio is smaller and noise becomes more of an issue.  This is why it is seen mostly in the dark or shadow areas and it will be worse in underexposed images as we have seen.

Getting the correct exposure is important in all aspects of phtotography.  In digitial photography there is an exposure technique that we can use to minimise noise called Expose To The Right.

The idea is to bias the histogram (covered this in earlier post here!) to the right towards the white end of the graph, still taking care not to clip the highlights.  If you overexpose and lose highlight detail you can't get it back, (post here!)  Then in Camera Raw adjust it back later to how you want your image to look.  As you are collecting the information, allowing the photosites on the sensor to capture the most amount of light, minimises the noise.  Try this if you are shooting with an dSLR and using Camera RAW!

Exposure adjusted down after exposing to the right (ETTR)

If you are using a long shutter speed, you can get a lot of noise from the heat generated by the sensor being exposed to low light for a longer time.   dSLR cameras will have a dark image subtraction feature that you can enable.  The camera essentially takes a second shot with the shutter closed for the same shutter speed as in your photo to generate a picture of the noise that is created.  It then subtracts this noise image information from your photo.
Bright light, low ISO, large sensor, and afterwards NR software will give the cleanest images and minimise noise.  Every camera produces noise and some more so than others.  Try testing your camera at different ISO settings and viewing them at 100% or higher to see what is the maximum setting for ISO that you are happy to live with.

More next Friday when I’m looking at brightness/contrast controls and adding punch to your photos!

Plum and June

Tuesday 24 June 2014

Mini Quilt Finish


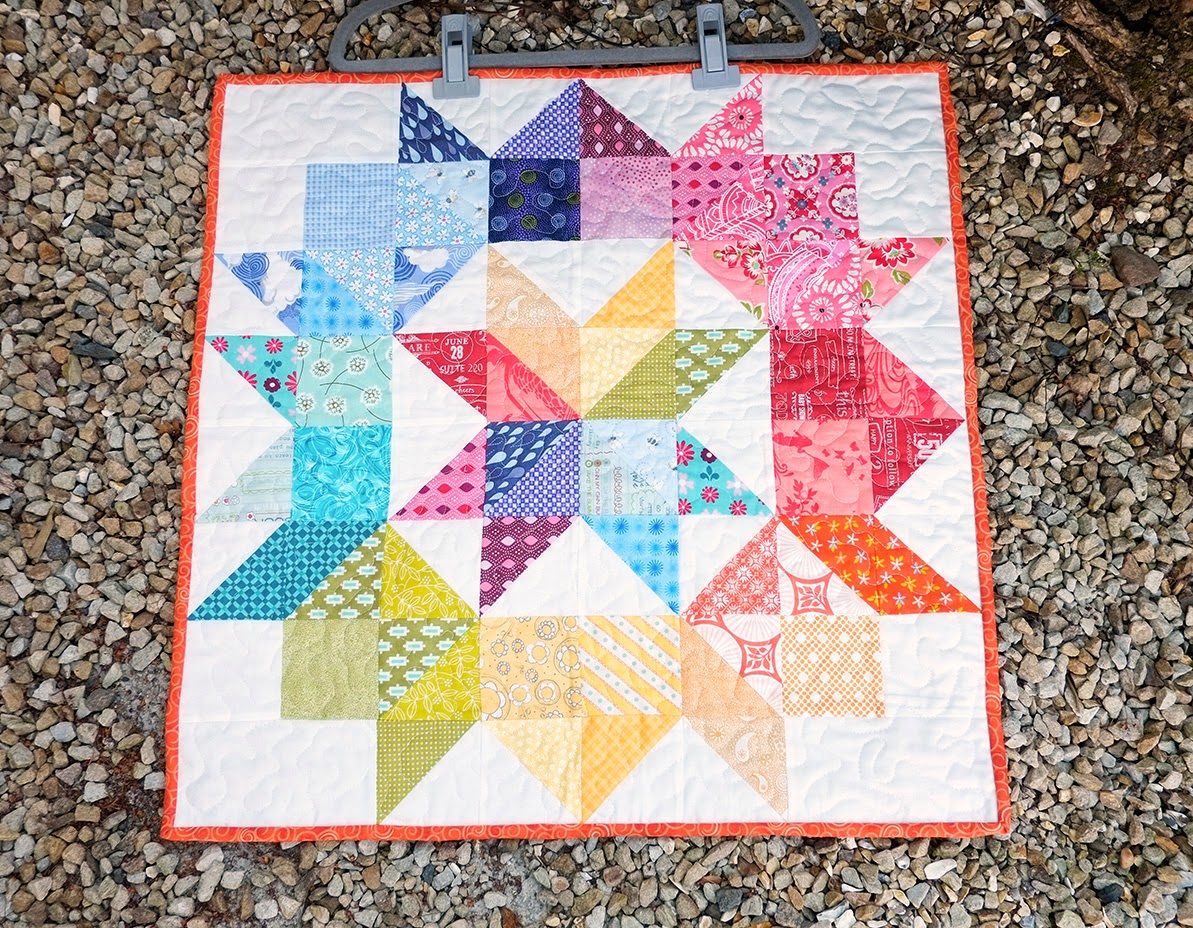
I finished my mini Swoon Quilt yesterday evening, binding sewn on and labelled and ready to go in the post for tomorrows ship date.  This is a project for Schnitzel & Boo's mini Quilt swap, called "Make a Quilt, Make a Friend"  (previous posts from initial idea , choosing fabrics and layout!).

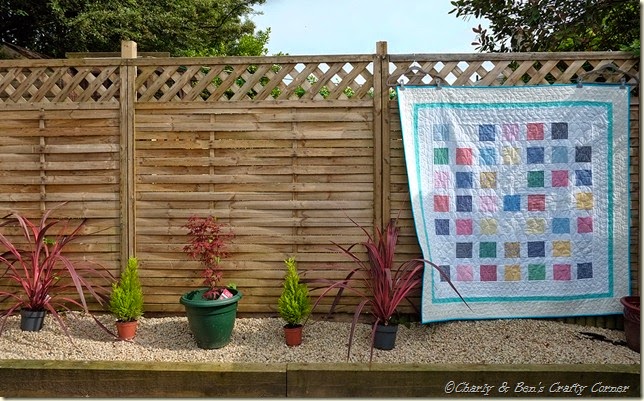
So this morning before work, I decided to take some photos in the early morning light.  I had fun wandering around the garden looking for a spot to show it off.


Wilbur wandered around following me, not quite awake himself.  I’m sure that dog thinks I’m half cracked!  (Charly wisely stayed in bed and didn’t poke her head out until breakfast!)


I quilted it with large wiggly stipple.  It was quick and fun and super easy.  After the class at the weekend in Free Motion Quilting, I'd probably do a separate design in the colours and something different in the white but I really like the stipple too so I'm quite happy with it.  Hope my swap partner is too!


I really like how bright and colourful it is.  My swap partner loves rainbow quilts and bright modern fabrics on white backgrounds.  She also loves Heather Ross but I couldn't find anything I liked for the centre of the star so I mirrored the half square triangles and tried to arrange the centre star along complimentary colours touching the outer ring e.g. blue and yellow, red and green.


This was a really fun project!  The quilt pattern for this Swoon block can be found in Camille Roskelly's shop.  The block measures 24" square finished and is an update of a traditional block that Camille found on a vintage quilt.  If you want to follow step by step instructions Camille teaches how to make this quilt block on Craftsy's in her class Pre-cut piecing made simple.

Linking up to all the Friday finishes! Crazy Mom Quilts and

Monday 23 June 2014

Free Motion Quilting with Mary Palmer


This weekend, I attended my first quilting class!  Mary Palmer was giving a class at the Limerick Quilt Centre on Free Motion quilting.  It was great fun!  We saw lots of inspirational work at the beginning of the day.  Mary had brought a huge pile of quilts for Show and Tell and talked us through the design process and quilting choices.  They were all so different and some were quilted on a teeny tiny scale!

 
Mary helped us set up our machines, ensure tension looked good (something I struggle with on my own at home!), gave us lots of tips and introduced us to FMQ designs like loops, hearts and flowers and out of the 12 panels most of us got 7 done.  These are my squares:


We were sent home with the instructions to practice, practice, practice!  From the few quilts I free motion quilted and my previous practice sessions at home I’ve been working on a much larger scale.


Figure of 8 is probably my new favourite design, though I wobble on starts and stops!  I have now added waves to my skill set too.

For our practice panels we were working in a space 8” square.  I found the smaller scale gave me much more confidence with FMQ and  I am determined to practice more and get spirals nailed down next.  After all, I have 5 blank squares left to fill up!

I can highly recommend this Free Motion Quilting Class, Mary was lovely and her quilts were fantastic as learning tools and inspiration.  We all had great fun, chatting the day away while practising what we were taught and the day flew by!

We were advised to use what we learned on a small project like a cushion.  Don't think I'll have a problem with that one! 

Friday 20 June 2014

Photo Friday: How to avoid blurred photos when hand holding your camera

There is a rule of thumb I learned from film photography on a 35mm SLR (Single Lens Reflex) camera that I thought I’d share with you today.

Even trying to keep perfectly still, our hands will make small movements. With live view and compact cameras, we have become used to holding the camera further away from the body and this can exaggerate movement.
Images in this post taken by me with second camera handheld or on tripod so be kind, I did my best! (Helper gone on holidays for 2 days. I think Wilbur is wishing Gordon would hurry up and come back!)

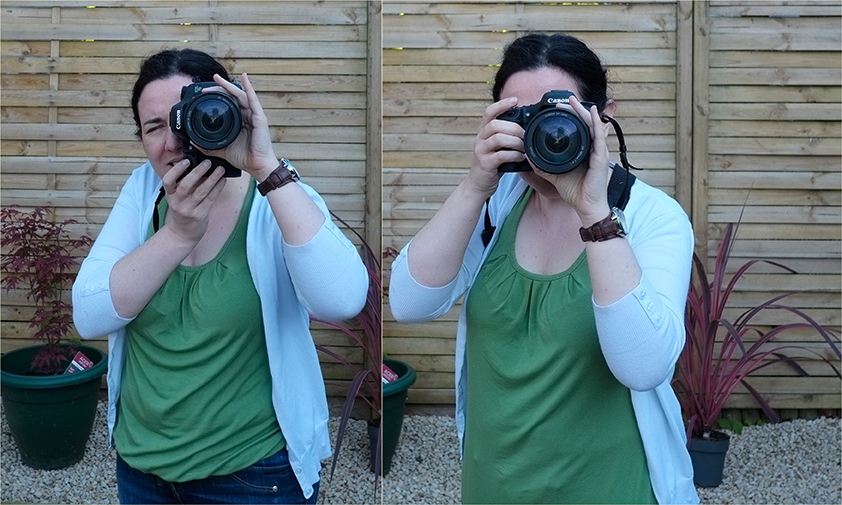
The correct way to hold an SLR camera, is to have one hand on the grip and the other supporting the lens, keeping your elbows close to the body and the camera at your eye.  Even with this stable position, if you use a slow shutter speed and leave the shutter open for a long time, to allow in more light to the sensor, the chances of a blurred image, due to camera movement increases. *Updated image! (Gordon came home and helped me - far easier to be behind the camera than in front of it!)

Camera Blur warning on bottom left
Compact cameras, even when on auto mode, (decide on the aperture and shutter speed for you) will give you a warning when the light is low and the shutter speed needed may cause a blurred photo.  This is quite common for indoor photos at night.  The camera usually displays a red or orange symbol of a camera with brackets to indicate movement.  When this happens the camera will try and use flash to add light and use a shorter shutter speed.  Unless you have flash turned off it will pop up on its own.

The rule of thumb in 35mm photography is the shutter speed should not be slower than 1/focal length of the lens you are using.  So if you are using a 50mm lens the shutter speed should not be slower than 1/60th second (nearest fastest to 1/50).  In fact to be on the safe side, a lot of people double this and shoot at a shutter speed of not less than 1/125th when hand holding the camera.  Some people can hand hold a camera at 1/30th of a second, I’ve tried it and most of the time it works out OK for me but I try to use 1/60th!


If you have a zoom lens, you make the calculation at the focal length to which you've zoomed e.g. you have a 24-105mm zoom.  At 24mm you may be able to handhold at 1/30th, better with 1/60th but at 105mm you would be looking at 1/125th of a second minimum. 


For a dSLR with an APS-C lens you need to put this back in 35mm terms but it’s not difficult.  An 18mm lens on an APS-C camera has a crop factor of 1.5 on Nikon and 1.6 on Canon.  This is equivalent to 27-29mm full frame (focal length x crop factor) so you would use 1/30th of a second minimum. 

To get your exposure at the aperture you want (last post we explained aperture, opening area of lens that light passes through), if the light is low, you will need to keep the lens open longer.  If the camera wants to use a shutter speed slower than that you are comfortable hand holding, for the aperture selected, you will need to use a tripod, balance the camera on a support (e.g. a wall) or increase the ISO.


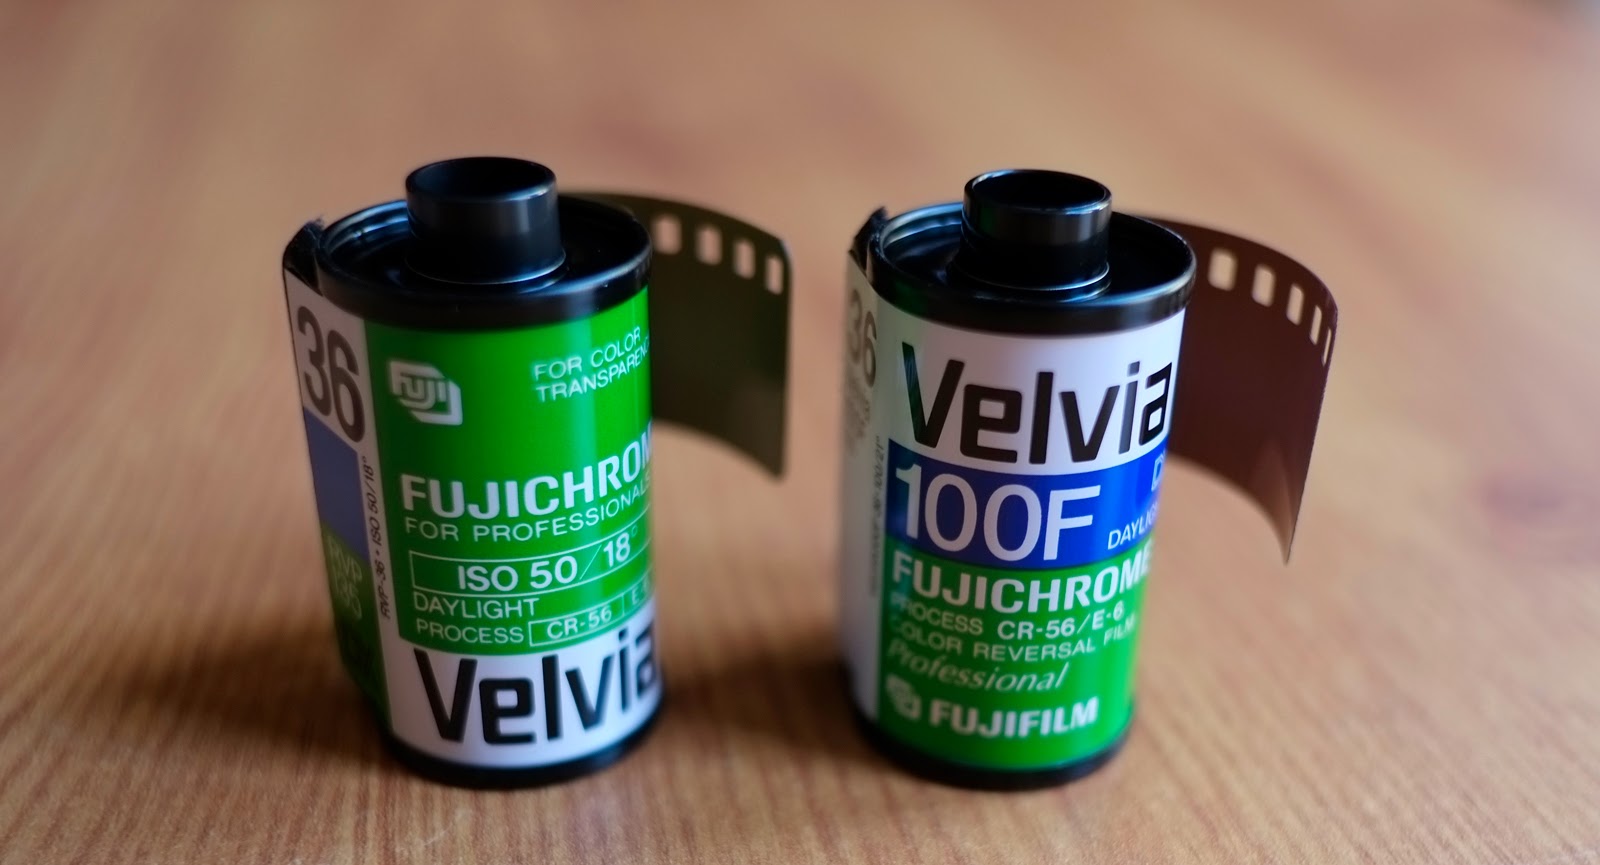
Anyone pre-digital would remember buying ISO film (sometimes called ASA).  For zoom cameras ISO 400 was preferred  instead of 100 or 200, as 400 film reacted to light faster allowing the use of faster shutter speeds (each jump in ISO doubles the light sensitivity of the film).  This was really helpful when zooming out, as at full zoom any hand movement is magnified.  ISO 50 and 100 were typically used for outdoors where most of the time there is bright light.  200 and 400 were recommended for cloudy days and 800, 1600 for sports or indoors or 3200 for low light.  High speed film could be damaged by x rays and you often see signs at airport security advising tested safe for film, so photographers don’t have to ask for a hand inspection.

With ISO in digital photography, while the physics of the sensor collecting light compared to film’s reaction to light, is very different, the principle of increasing ISO in low light to get a good exposure or increase shutter speed to avoid blur remains the same.  The additional bonus with digital is you change it from shot to shot, unlike film where you were committed for 36 frames!


Many cameras will have an auto setting.  The camera chooses the lowest ISO needed for the shot and can increase ISO as shutter speeds decrease.  When using a compact camera and you get the handheld warning sign, you have the choice of increasing the ISO, if not at the maximum already, or allowing flash.  Sometimes you don’t want to use flash (in a museum, night time photos in the city, at a concert etc.) so you can try finding a support to lay the camera on or use a tripod.

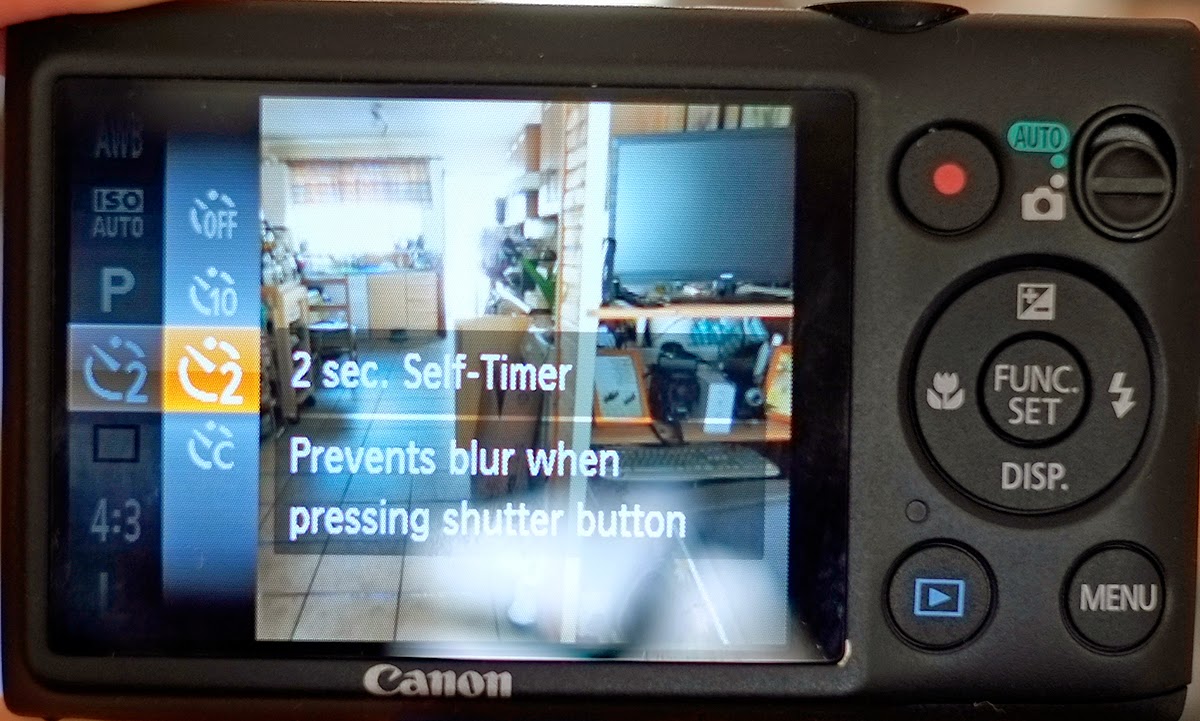
Tip: If using a support e.g.wall, table or tripod, try using the timer function on the camera as your hand movement on the shutter button can cause a little camera shake and the timer will ensure the photo is taken when your hands are free of the camera!

When using a dSLR there is a wider range of ISO settings available to you.  Every camera will have a native ISO setting that gives the least amount of noise.  It’s usually ISO 100 or 200.  As you increase ISO you increase the noise in your image.  Noise is a random pattern of discolouration in your image.  It can give a very speckled appearance and degrades the image particularly in dark or shadow areas.  (In the next post I’ll talk more about noise, what causes it, minimising it and post processing software to control it.) 

Noise Reduction applied on left, original as shot on right!
But for now don’t be afraid to increase the ISO if you are dealing with slow shutter speeds that will cause blur when handholding.  If you can’t add more light or wait for daylight, better to take a sharp noisy shot that can be processed afterwards, than a blurred shot with no noise that you can do nothing with.  Just remember to change the ISO setting back when you are done!

Plum and June

Related Posts Plugin for WordPress, Blogger...